
How to Install Central Air Conditioning Yourself

How to Install Central Air Conditioning Yourself: What You Need to Know
You can handle parts of a central air conditioning project yourself, but a complete central AC installation is not a typical plug-and-play DIY job. The project can involve equipment sizing, ductwork, permits, high-voltage electrical connections, refrigerant piping, evacuation, charging, airflow setup, and final system commissioning. Some of those tasks require professional qualifications or certification.
For most homeowners, the best DIY approach is to understand the process, prepare the site, make informed equipment decisions, and leave refrigerant, electrical, and commissioning work to qualified professionals. This guide explains what is involved so you can decide which parts are realistic for you and when professional installation makes more sense.
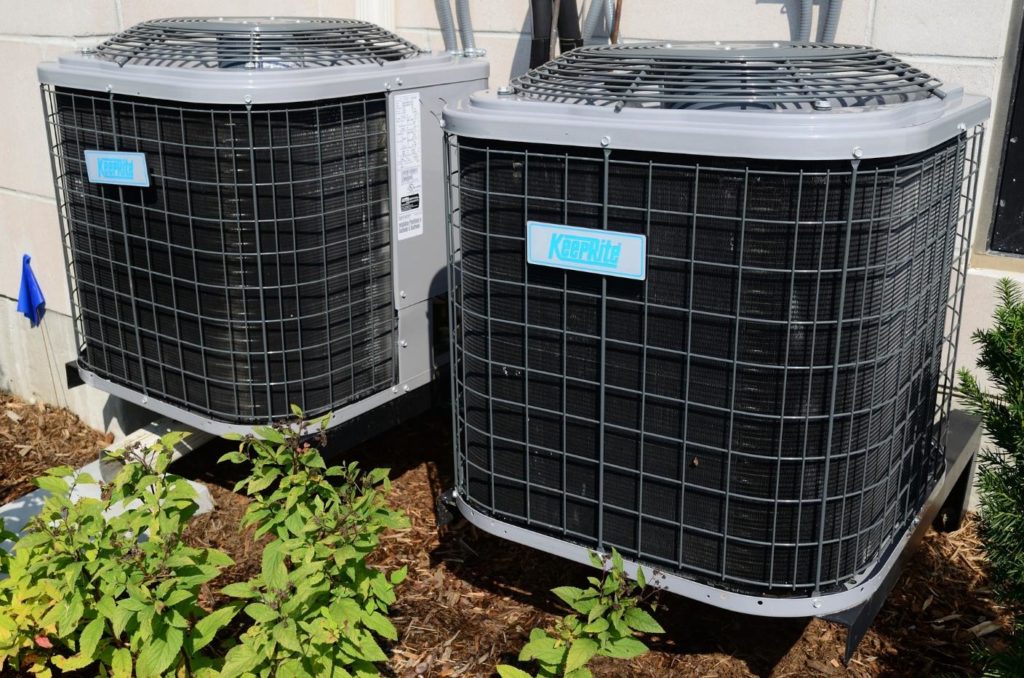
Photo by ElasticComputeFarm Licensed under CC0
Can You Install Central Air Conditioning Yourself?
Possibly, but only in a limited sense. A skilled homeowner may be able to help with planning, site preparation, basic carpentry, filter access, thermostat selection, or certain duct-sealing tasks. The technical core of a central AC installation is different.
EPA Section 608 requires certification for technicians who perform work on stationary air-conditioning equipment that can release regulated refrigerants. Activities such as attaching or removing gauges, adding refrigerant, removing refrigerant, or otherwise opening the refrigerant circuit fall within regulated service work. Local building codes may also require permits, inspections, licensed electrical work, or licensed HVAC work.
That means the answer is not simply ‘yes’ or ‘no.’ You can participate in the project, but the refrigerant circuit, electrical connections, code compliance, and final startup are areas where professional installation is usually the safer and more practical choice.
How Central Air Conditioning Works
A typical split central air conditioner uses an indoor evaporator coil and blower together with an outdoor condenser and compressor. The system recirculates indoor air through the return ducts, removes heat and moisture at the evaporator coil, and sends cooled air back through the supply ducts. Refrigerant carries the absorbed heat to the outdoor unit, where the condenser releases it outside.
Some homes use packaged systems that combine more components in a single outdoor cabinet. Regardless of the configuration, the equipment must be matched, sized, connected, and commissioned correctly for the system to deliver the expected comfort and efficiency.
Before You Buy an AC System
1. Confirm the Cooling Load and Equipment Size
Do not size a new air conditioner only by matching the tonnage of the old unit or using square footage alone. A proper load calculation considers factors such as insulation, window area, air leakage, orientation, local climate, occupancy, and the home’s layout.
Oversized equipment can cycle on and off too quickly, which may reduce humidity control and comfort. Undersized equipment may run for long periods without keeping up on hot days. A professional load calculation is the best starting point for choosing capacity.
2. Check the Existing Ductwork
If the home already has ducts, they still need to be evaluated for size, leakage, restrictions, insulation, and airflow. New high-efficiency equipment will not perform as intended if the duct system cannot move the required air.
Homes without usable ductwork may require a significant retrofit. In some cases, a ductless mini-split or another system type may be a better fit than adding a complete central duct system.
3. Confirm Electrical Capacity
Central AC equipment requires dedicated electrical circuits, properly sized overcurrent protection, disconnects, wiring, and grounding. The exact requirements depend on the equipment nameplate and local electrical code. If the existing electrical service is not adequate, additional work may be required before installation.
4. Check Permit and Inspection Requirements
Permit requirements vary by city, county, and project type. Before ordering equipment, confirm whether the work requires mechanical, electrical, structural, or other permits and whether a final inspection is required. A professional HVAC contractor can normally manage this process as part of the installation.
5. Review Manufacturer and Warranty Requirements
Before choosing a DIY route, read the manufacturer’s installation instructions and warranty terms. Some warranties or labor protections may depend on proper installation, equipment matching, registration, and documented professional service.
Photo by ElasticComputeFarm Licensed under CC0
The Central AC Installation Process
The exact sequence varies by equipment and home, but a professional central air installation normally follows the stages below. This is an overview for planning and decision-making, not a substitute for the manufacturer’s installation manual or required professional training.
Step 1: Select Matched Indoor and Outdoor Equipment
The outdoor condenser, indoor evaporator coil, air handler or furnace, thermostat, and controls need to be compatible. Matching matters for capacity, efficiency, refrigerant type, airflow, and warranty coverage.
Step 2: Prepare a Suitable Outdoor Location
The outdoor unit needs a stable, level support, adequate service clearance, and sufficient airflow. It should be positioned where it can be maintained without being blocked by landscaping, stored items, or fencing. The manufacturer’s required clearances should guide the final placement.
Step 3: Install or Prepare the Indoor Components
The indoor coil and blower section must be correctly oriented, sealed, drained, and connected to the duct system. Condensate drainage is especially important because poor drainage can lead to water damage, microbial growth, or system shutdowns.
Step 4: Connect Ductwork and Verify Airflow
Supply and return ducts should be sealed and sized to support the system’s required airflow. The installer also checks the filter arrangement, registers, dampers, and air handler or furnace settings so the system can move the correct volume of air.
Step 5: Install the Refrigerant Line Set
The line set connects the indoor and outdoor refrigerant components. Correct tubing size, routing, insulation, brazing or approved connection methods, leak testing, and contamination control are essential. This is one of the parts of the job that generally belongs to a trained HVAC technician.
Step 6: Complete Electrical and Control Wiring
The condenser, indoor unit, thermostat, disconnect, breakers, and controls must be wired according to the equipment instructions and electrical code. Central HVAC equipment combines low-voltage controls with high-voltage power, so this work should be completed by a qualified person.
Step 7: Evacuate, Leak-Test and Charge the Refrigerant Circuit
A new system must have a clean, dry, leak-free refrigerant circuit and the correct refrigerant charge. Even equipment that arrives with a factory charge may require adjustments based on the installed line length and system configuration. This step requires proper tools, procedures, and compliance with EPA refrigerant rules.
Step 8: Start Up and Commission the System
A system that turns on is not automatically a correctly installed system. Commissioning can include verifying airflow, temperature change, static pressure, refrigerant performance, condensate drainage, thermostat operation, electrical measurements, safety controls, and the manufacturer’s required startup checks.
DIY vs. Professional Central AC Installation
| Factor | DIY involvement | Professional installation |
|---|---|---|
| Equipment selection | Possible, but sizing and equipment matching can be difficult | Load calculation and matched-system recommendations |
| Permits / inspections | Homeowner must research and manage local requirements | Contractor usually coordinates required permits and inspections |
| Electrical work | May be restricted by local code and presents shock/fire risk | Qualified installer/electrician completes code-compliant connections |
| Refrigerant work | EPA Section 608 rules apply to regulated service activities | Certified technician handles refrigerant circuit and charging |
| Ductwork / airflow | Basic sealing may be DIY-friendly | Systemwide airflow, static pressure and duct sizing can be verified |
| Warranty / startup | Risk of missed installation requirements | Installation and commissioning can be documented |
| Time / troubleshooting | Can take substantially longer for an inexperienced installer | Experienced crew can diagnose issues during startup |
Common DIY Central AC Installation Mistakes
- Choosing equipment based only on the old unit’s size instead of a current load calculation.
- Assuming existing ductwork is automatically suitable for the new system.
- Installing the outdoor unit where airflow or service access is restricted.
- Failing to provide proper condensate drainage and overflow protection.
- Using incorrect line-set sizing, routing, insulation, or connection practices.
- Skipping a proper evacuation, leak test, or refrigerant charge verification.
- Powering up the system without confirming airflow and electrical setup.
- Ignoring permit, inspection, manufacturer, or warranty requirements.
- Treating startup as complete because cold air comes from the vents.
What Can a Homeowner Realistically Do?
If you want to reduce project cost or stay involved, focus on tasks that do not require opening the refrigerant circuit or working on energized HVAC equipment. Depending on the project and local rules, homeowner-friendly preparation may include:
- Clearing and preparing the work area.
- Removing stored items that block indoor equipment or duct access.
- Improving attic or crawlspace access before the installation crew arrives.
- Discussing thermostat and comfort preferences with the installer.
- Replacing filters and learning the new maintenance schedule.
- Completing nontechnical finish work after the installation, where appropriate.
The more technical the project becomes, the more valuable professional installation is. Refrigerant handling, electrical work, equipment commissioning, and system-level airflow setup are not good places to learn by trial and error.
Photo by falco Licensed under CC0
After Installation: Protect the New System
Once the new AC is operating, routine maintenance helps protect efficiency and reliability. Check the filter regularly, keep the outdoor unit clear of debris, make sure condensate drains remain clear, and schedule professional cooling maintenance based on the manufacturer’s recommendations.
AirAce offers a Maintenance PlanPro that includes cooling and heating service, inspection and cleaning of indoor and outdoor coils, refrigerant operating-pressure checks, outdoor fan inspection, compressor amperage checks, electrical inspection, and other preventive maintenance items.
Professional Central AC Installation in East Peoria
If you are comparing DIY installation with professional service, AirAce Heating & Cooling provides air conditioning installation and repair in East Peoria. The team can help evaluate the home, select equipment, complete the installation, and explain the system’s operation and maintenance needs.
You can also review AirAce’s HVAC products and financing options when planning a replacement or new central air system.
Frequently Asked Questions
Can I legally install my own central AC?
Rules vary by location and by the part of the project being performed. Mechanical and electrical permits may be required, and some work may need to be performed or inspected by licensed professionals. Refrigerant service is also subject to federal EPA requirements.
Do I need EPA certification to work with AC refrigerant?
EPA Section 608 requires technicians who service stationary air-conditioning equipment in ways that can release regulated refrigerants to be certified. This includes activities such as connecting gauges, adding or removing refrigerant, or otherwise opening the refrigerant circuit.
Can I reuse my existing ductwork?
Possibly. Existing ducts should be checked for size, leakage, insulation, damage, restrictions, and whether they can deliver the airflow required by the new system. Reusing poorly performing ductwork can limit the benefit of a new air conditioner.
How long does central AC installation take?
The timeline depends on whether the home already has compatible ductwork and electrical service, how much equipment is being replaced, permit requirements, and whether additional modifications are needed. A straightforward replacement is very different from adding central air to a home without ducts.
Is DIY central AC installation always cheaper?
Not necessarily. Avoiding labor can reduce part of the upfront cost, but tools, permits, equipment delivery, rework, lost time, warranty issues, or mistakes can offset those savings. Compare the total project cost, not just the installation labor line item.
What should be checked before the installer leaves?
Ask how the system was sized, confirm the thermostat and all zones or registers operate correctly, review filter size and maintenance, verify condensate drainage, and make sure you receive equipment and warranty information. The installer should also complete the manufacturer’s required startup and commissioning checks.
Thank you for explaining that you should choose a location that has good airflow. We’ve been wondering where we should be getting our AC installed for our new home. I’ll be sure to keep this in mind when choosing the right place for it.
Very interesting article, thanks for the provided information